

Best Background Images For Lyrics Video
For a long time, people had to depend on complex software to create lyric videos. They were both expensive and hard to use.
Stock images, videos, options to add text animations, beautiful visual effects, gratis music tracks; you have everything you need to brand a lyric video inside the Animaker application.
If you prefer learning past watching videos, then check out this video tutorial on creating lyric videos.
But if you prefer a stride-by-pace written guide then merely keep scrolling.
Before starting with the kickoff step, I would suggest you practice the steps parallelly equally yous move through them. If you lot exercise that, while nosotros attain the end of this article you would have made significant progress and you volition be confident and skilled plenty to complete a full-fledged lyric video. And so without further ado, let's dive right in!
It's super uncomplicated. Get to the lyric video maker folio from Animaker and sign upwardly for a gratis account. 
You volition be redirected to the dashboard of Animaker. From here, select
Create > Create a Video > Blank Page.
Step ii: Add the music rail to the project.
To upload a music rail, open the 'Uploads' section in the library (present on the left side). 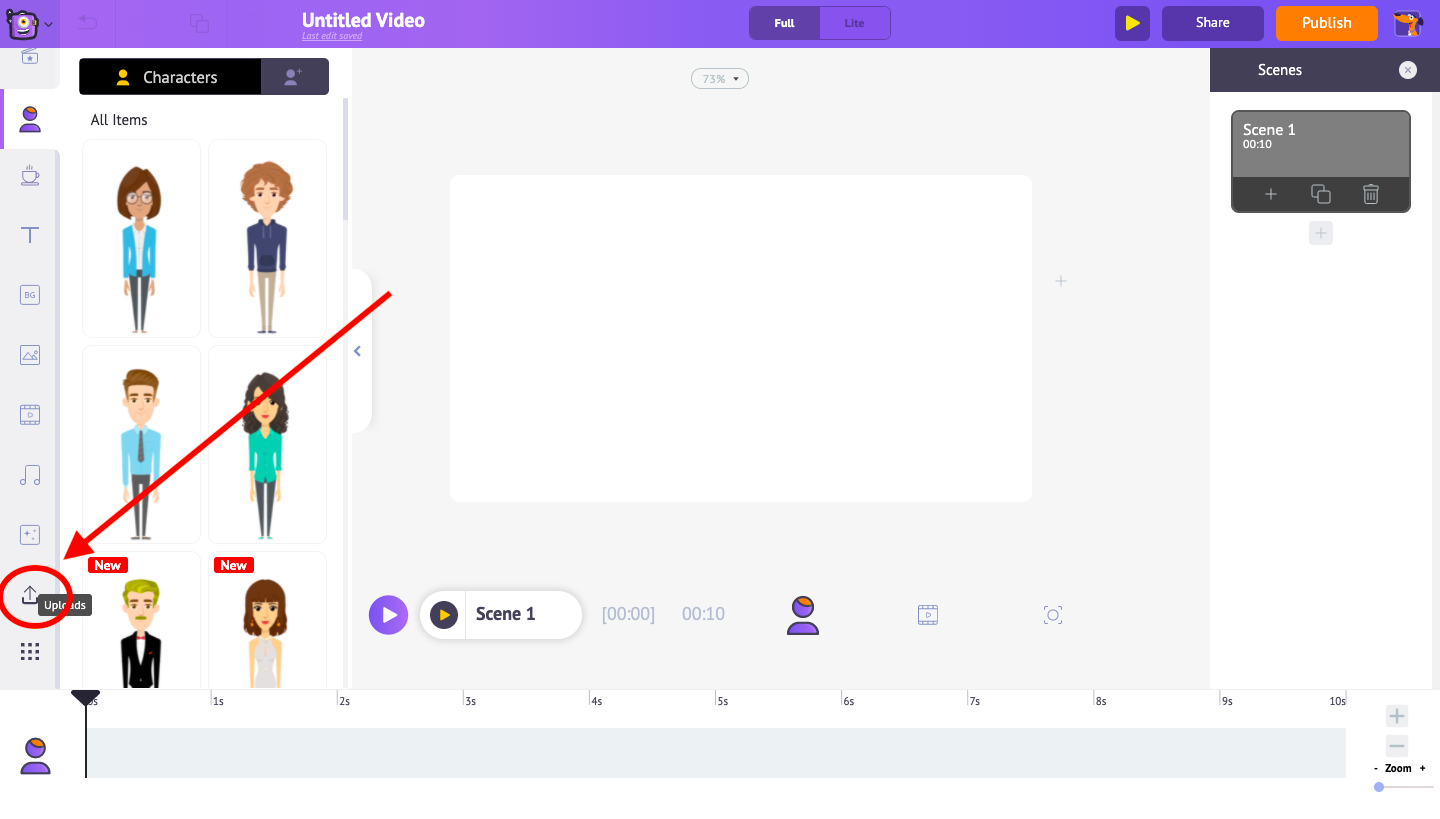
At present click on the upload icon and select the image that you want to upload. Once information technology gets uploaded, just select information technology to load it into the projection. 
Step 3: Add a background.
There are 3 different types of backgrounds that you can add to your videos.
- Video backgrounds.
- Image backgrounds.
- Colorful slope backgrounds.
i.) Video backgrounds:
Let's start with knowing how to add a video background. Either you lot tin can upload your videos or you can use the stock video clips within the application.
If you decide to upload and use your ain video as the background, y'all can use the upload push to do information technology. The upload process is exactly similar to the manner you uploaded your soundtrack in the previous footstep.
Permit'south see how to use the stock clips. Go to the videos section present in the library. Use the search bar to find a video. Click on it and y'all tin can encounter it appearing on the workspace at the center of the screen.
Yous tin can notice a fix of options actualization forth with the video. This is called the 'Particular menu'. Inside the detail carte, yous have the 'trim' selection that allows you to trim the video. 
2.) Image backgrounds:
Let'south move on and encounter how nosotros can add an epitome background. Creating an epitome background is similar to creating a video groundwork. You lot can either utilize i of your images using the upload section as we did for the music track, or you can use i of the stock images available within the awarding.
Allow's see how to use the stock images. Become to the images section in the library. At present search and find an image that you would similar to add to the video. But click on the image and you lot will see it actualization at the center of the workspace.  You will see the 'Item menu' appearing along with the image. It has an option named 'Prepare as BG'. If you click on it, this paradigm will be set equally the background of the scene.
3.) Colorful gradient backgrounds:
At present, we know how to add epitome and video backgrounds. Let's take a look at the last background type that nosotros have - Gradient backgrounds. Click anywhere on the workspace. You can see a new selection appearing at the bottom. Apply that option to apply a new color to the workspace. Yous can add up to 5 different colors to the aforementioned background.  This gradient background looks make clean. Only it would be cool if nosotros could add some patterns and designs to it, right?! Let'southward see how to add beautiful patterns to the background. This part is optional, y'all can skip it if yous wish!
Go to the properties section in the library and select a shape that y'all want to add every bit groundwork. I'k selecting this star and changing its color. Finally, I reduce its transparency and size. You tin change the color and transparency using the options present on the right side of the application. To reduce its size, click and drag any one of its corners.  Let'due south recreate this star multiple times and fill the workspace to brand information technology look like a pattern. To recreate, copy the star by pressing 'Ctrl+c' (for Windows OS) or 'Cmd+c' (for macOS), and paste it multiple times past pressing 'Ctrl+v' or 'Cmd+v'.
Position the stars in a style that they look scattered across the workspace.  (Pro Tip: Agree the Ctrl or Cmd fundamental and select all the stars. Now on the item menu, you have an option named 'Group'. Click on it. Now do a right-click on the stars and select 'Movement to last'.
By doing this all the stars are clustered into a single object and moved to the background then that we won't stop up accidentally selecting and moving one of the stars while we bring in new elements into the scene). 
Step iv: Add text and blitheness effects.
To add together text, go to the text section present in the library. Here you have two more options.
On the meridian are the customizable text boxes and at the lesser are the pre-built text designs. I'm going to select ane of the customizable text boxes. 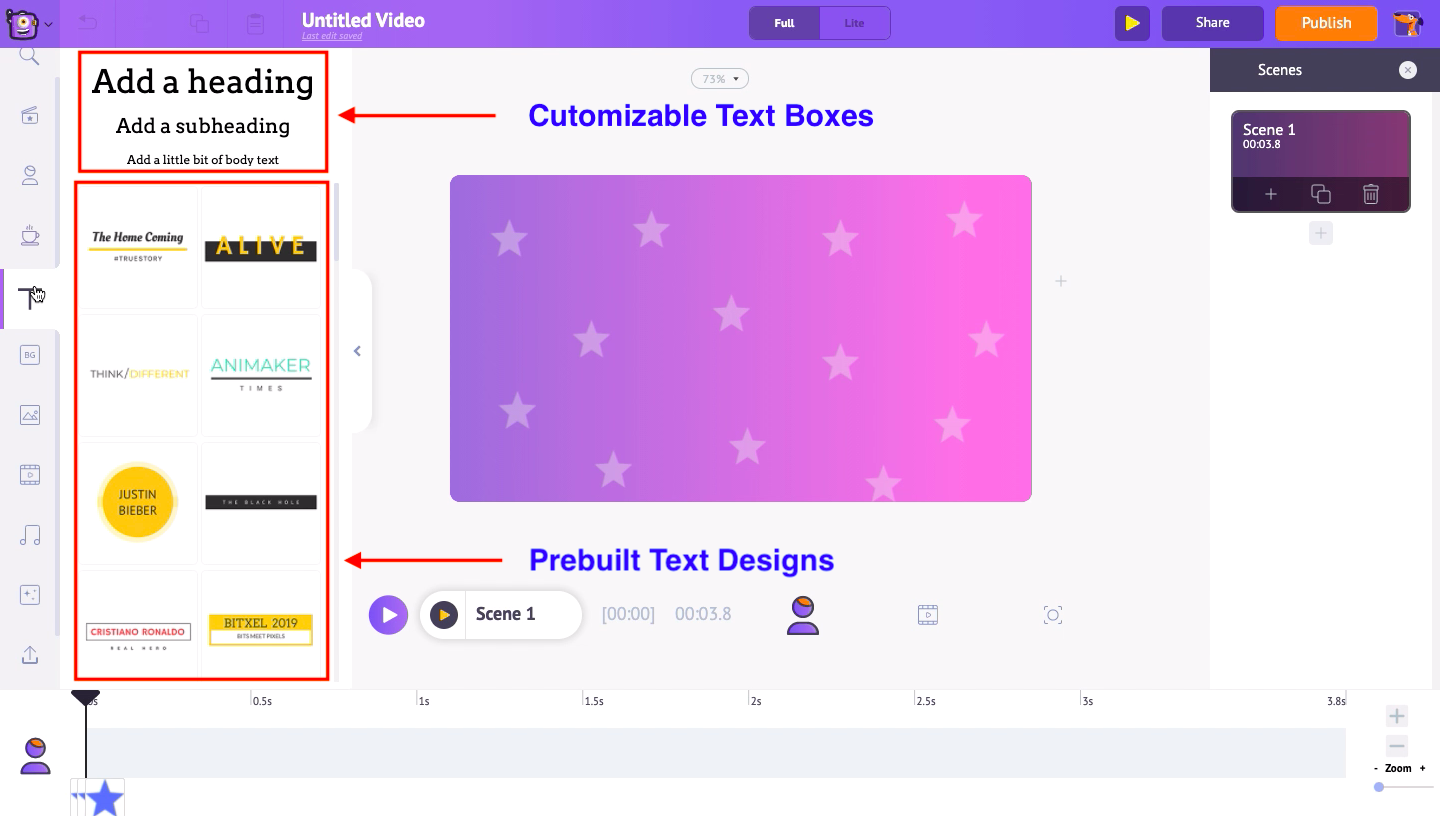 Now type in the text that you want. You can modify the font style, color, and size using the options on the correct side carte.
  At the bottom, yous tin run across a regal bar actualization on the timeline.
 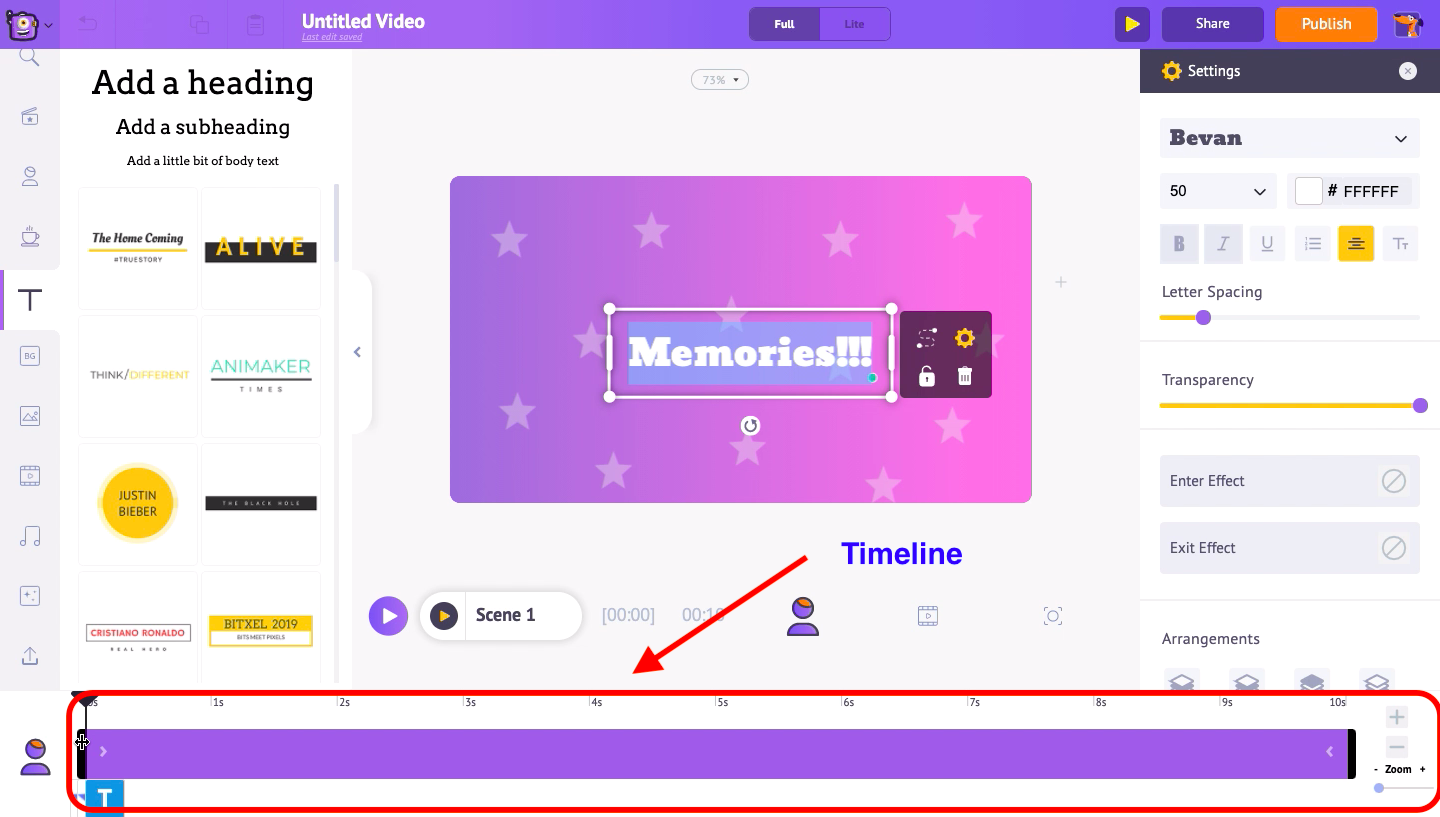 This bar represents how long that specific element is going to be visible. Y'all can arrange the visibility of the text past clicking and dragging the edges of the bar. I'one thousand going to keep information technology between the tertiary and the seventh second so that this text volition exist visible just during this elapsing.
  Let'south see how to add animation furnishings to the text. Once you select the text, you tin observe a couple of options named 'Enter outcome' and 'Get out effect' on the right side.
 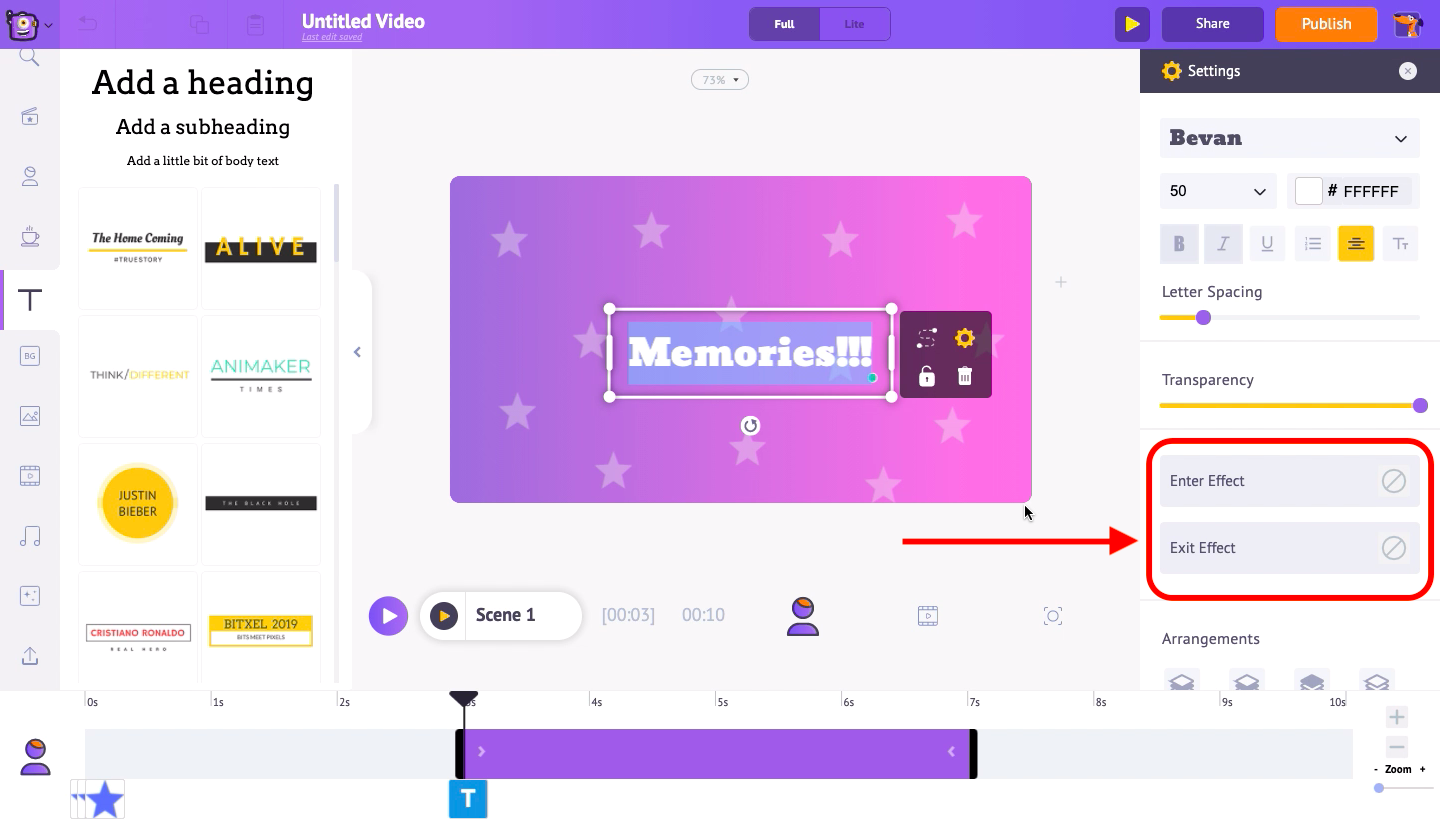 Utilise them to utilize entry and get out effects to the text. Y'all tin too recognize those furnishings in the timeline from the new pink part within the purple bar.
Footstep five: Upload your images.
Sometimes we may desire to include the images of our friends and loved ones in the lyric video. For example, if we are making a lyric video to gift someone on their special day, or as a tribute to a love creative person, we may want to include their picture within the video, correct?!
In that example, employ the upload section of the library to upload your images.
Click on the upload pick and select the image yous want to upload. One time it gets uploaded, click on it to load it into the workspace. You tin resize it by selecting and dragging one of its edges. Move the paradigm and place it wherever you want it to announced in the video.  Here'south a special pull a fast one on that volition improve the looks of the prototype uploaded. Go to the properties section in the library and select a foursquare. Scale down its size and place it over the image. Right-click on it and select the option 'Motility to back'.
This little pull a fast one on gives a polaroid picture effect to your photos. You can also change the colour of this foursquare using the options on the right side. 
Step 6: Add photographic camera effects.
To add camera effects, open the camera timeline by clicking on the third icon (from left to correct) above the timeline. 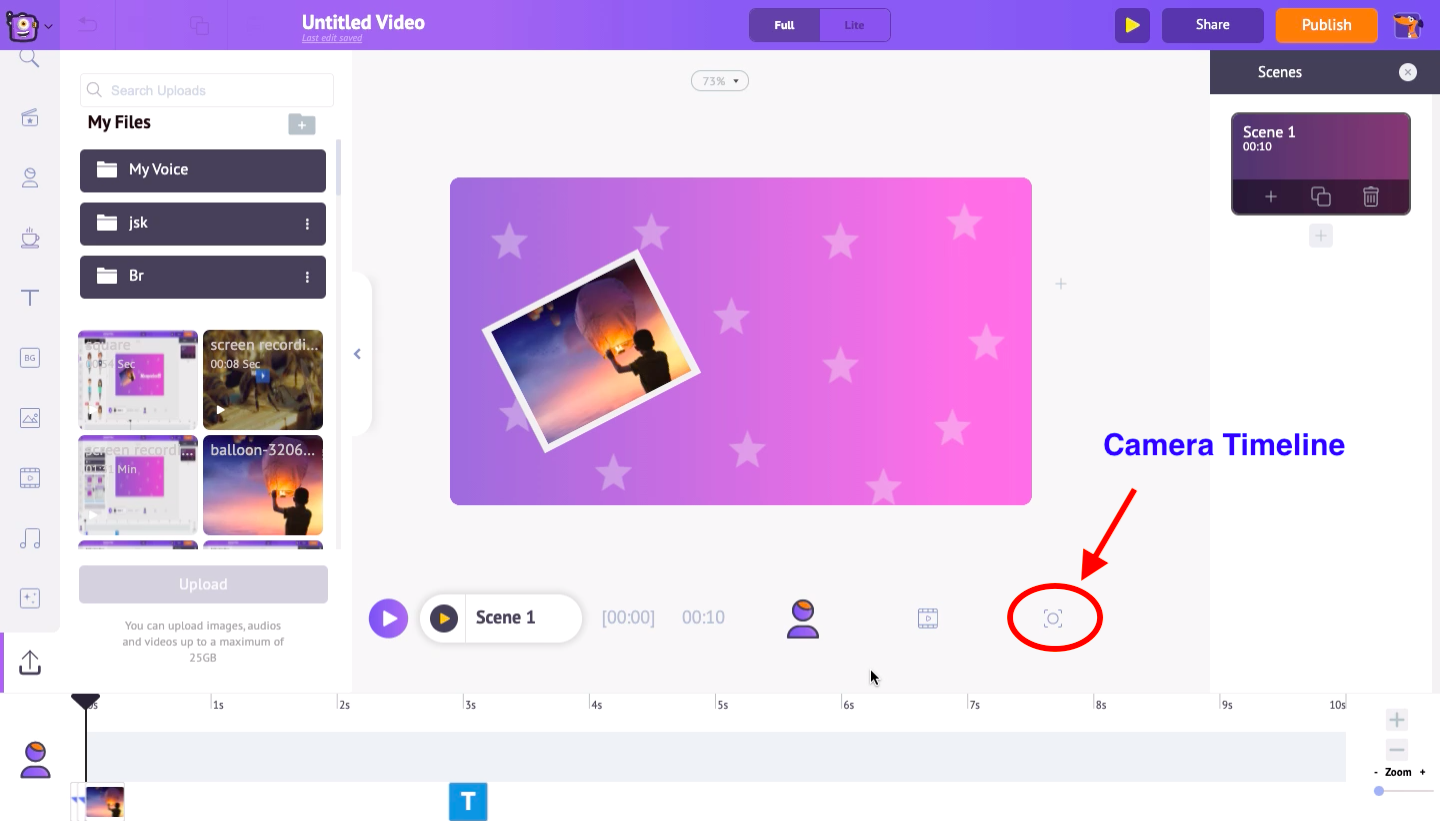 Once you switch to the camera timeline, you can see a royal bar with a xanthous icon in information technology. Click on it and you can encounter 2 options named 'Static Camera' and 'Dynamic camera'. Select the 'Dynamic camera' selection.
 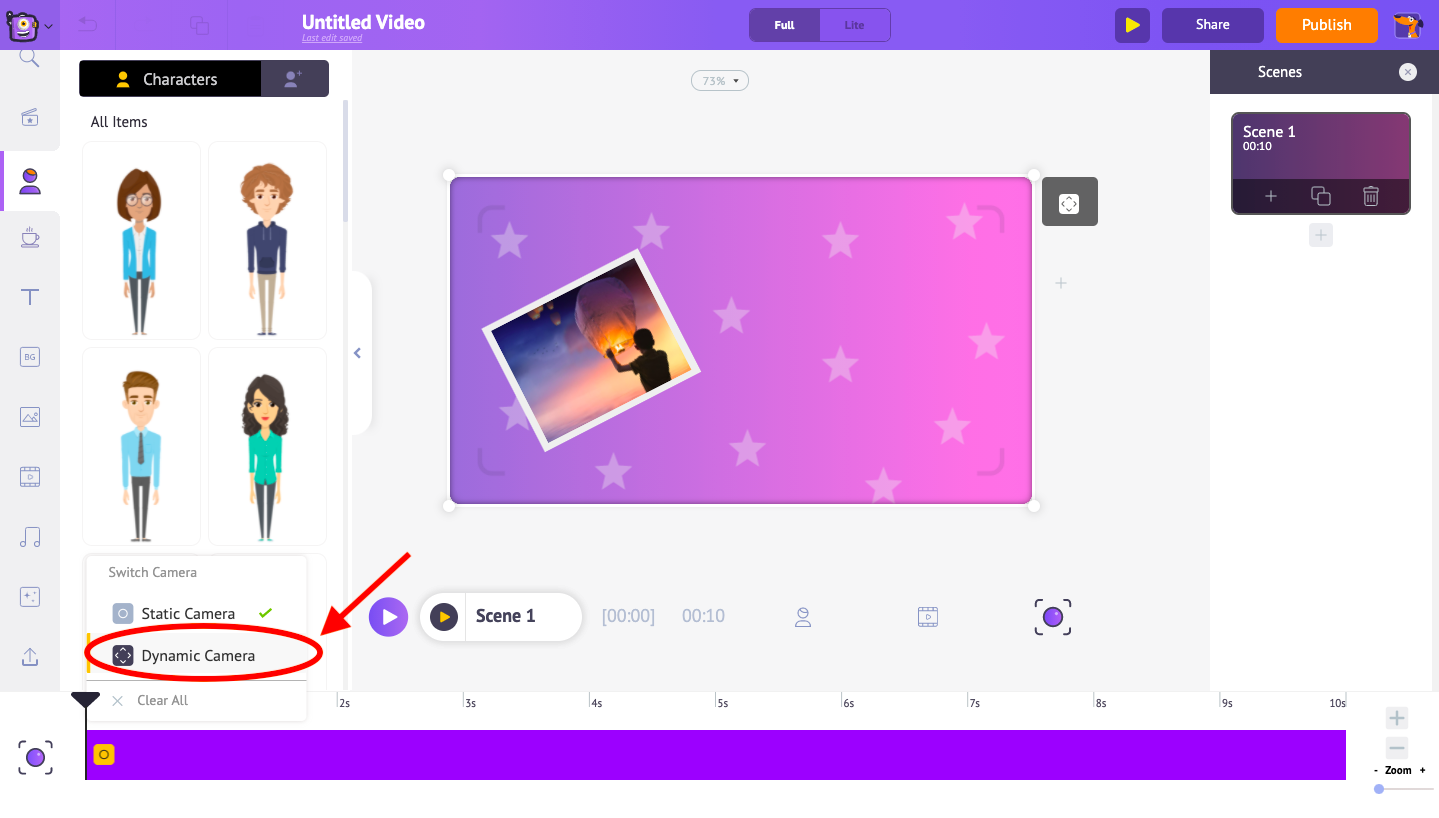 Now you tin can run across a new pink-colored portion in the bar. By adjusting its length we tin can control the duration of the camera result.
I'g extending information technology till the 8th second which ways the photographic camera effect will happen till the 8th 2nd.
Over the workspace, y'all can see the frame of the camera. Drag and adjust it to control the focus of the camera. By doing this, the camera will slowly zoom in and focus on the role of the screen where we placed the frame. 
Step 7: Add Screen furnishings.
If y'all want to improve the looks of your video, you can do that by adding special furnishings. In the library, you have the special effects department from where you tin can choose amidst a lot of different special furnishings.  I'm going to select the one that looks like decorative stars hanging from the superlative.
Step 8: Adjust the duration of the scene.
If you want to increment or decrease the duration of the scene, y'all tin can do that by using the '+' and '-' options in the timeline. These options volition increase and decrease the duration of a scene past 1 2d for each click. 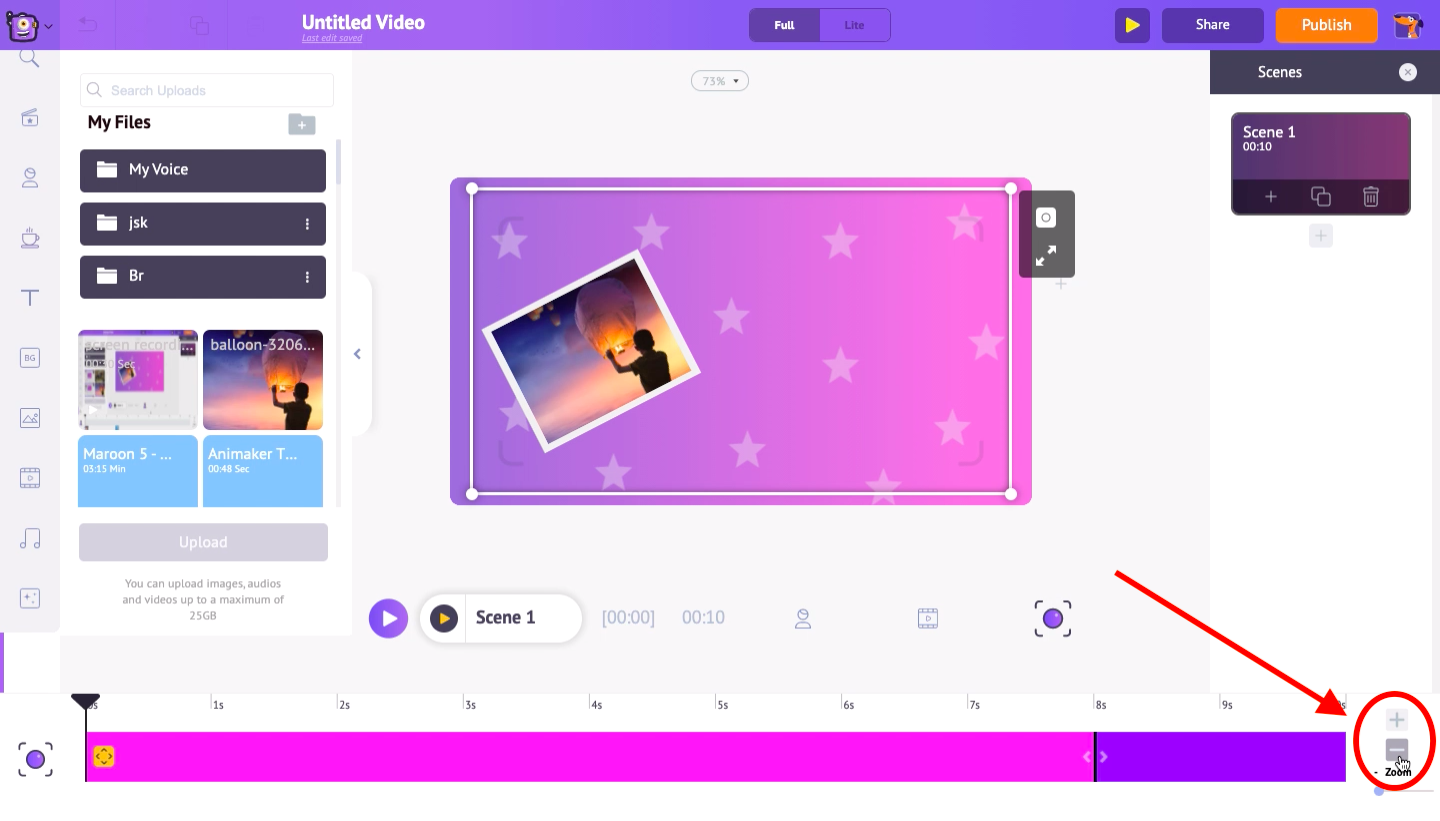 I'm going to reduce this scene's duration to 8 seconds.
  Yay! You accept learned everything you would need to make a lyric video. Now, all y'all have to do is, create a new scene and repeat the steps from 3 to 8 and complete your video.
You can create a new scene in two means. You can either create a brand new scene and get-go from scratch. Or, you tin can duplicate the current scene and swap the images and videos, edit the text, and practice other required changes as you wish.
If yous desire to get-go from scratch by creating a new scene, become to the scenes section on the right side of the awarding and select the 'New scene' icon. 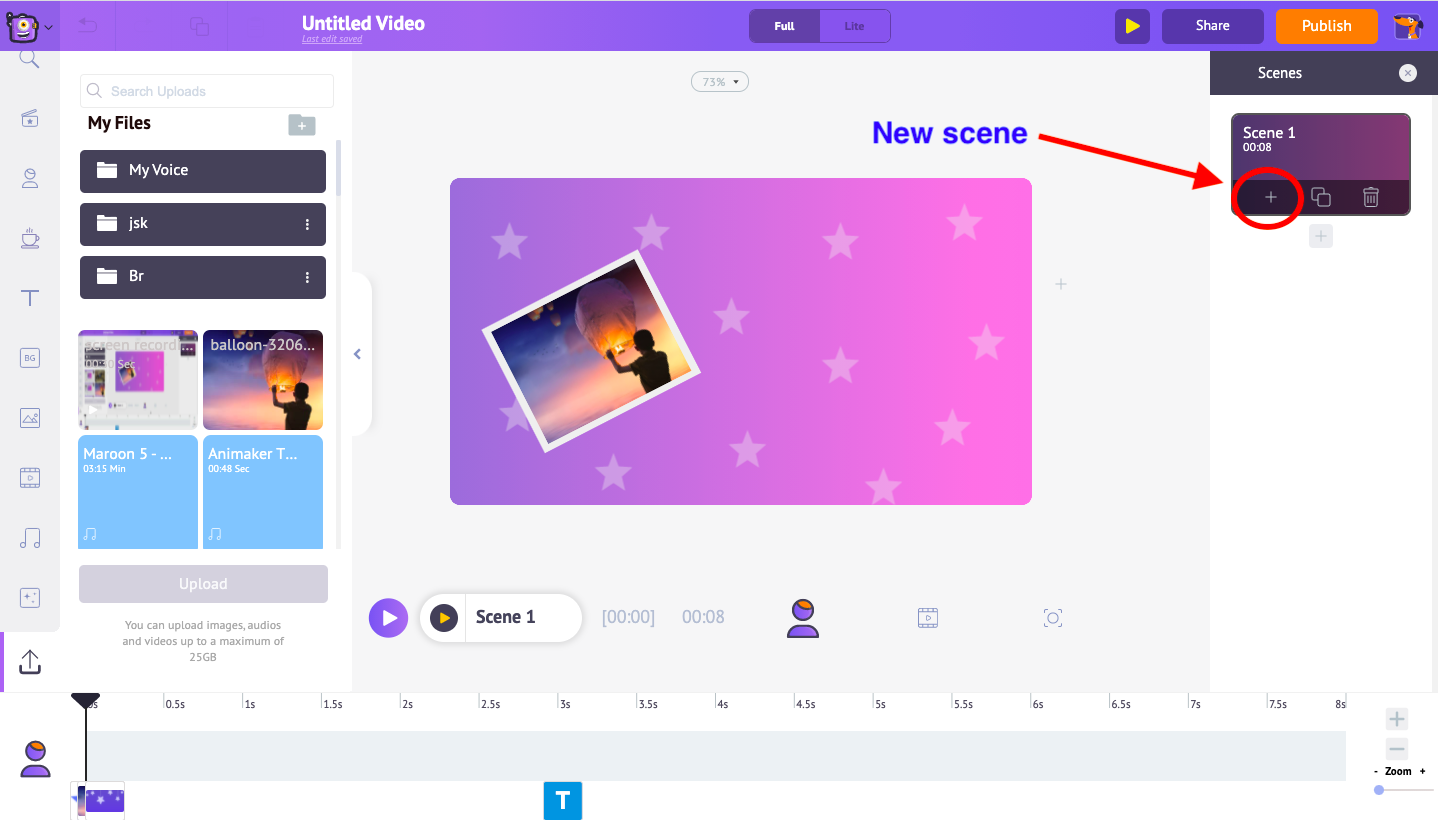 Simply if you desire to indistinguishable the current scene and edit information technology, click on the 'Indistinguishable scene' option.
  At present, click on the image or video that yous want to replace. On the item menu, y'all can see an option named 'Swap'. Click on it and select the new image or video that you want to replace the old one with. The new image tin can exist either the stock images within the app or information technology can be an uploaded image, yous can swap with anything you lot want.
  That's it. You are all fix to create your kickass lyric video. And if you take been practicing the steps while reading the article, y'all would have already created a part of your lyric video past now.
If yous oasis't done that yet, don't worry. It's better late than never. Go and kickoff creating your lyric video now!
Happy Video making :)
Source: https://www.animaker.com/blog/how-to-make-a-lyric-video/
0 Response to "Best Background Images For Lyrics Video"
Post a Comment